
Managing a successful WordPress site involves more than just publishing content—it requires in-depth insights, performance monitoring, and continual optimization. That’s where Google Site Kit comes in. As Google’s official plugin for WordPress, Site Kit brings together essential tools like Search Console, Analytics, PageSpeed Insights, Tag Manager, and AdSense into a single, easy-to-use dashboard.
Whether you're a blogger, a small business owner, or an SEO professional, understanding how to set up and maximize Site Kit can dramatically improve how you measure and grow your site’s visibility.
In this guide, you’ll learn how to install Site Kit, seamlessly integrate your website with Google services, track analytics, submit robots.txt and apply actionable SEO strategies that enhance search rankings. If you're looking for a streamlined solution to manage everything from organic traffic data to monetization, this comprehensive walkthrough is exactly what you need.
What is Google Site Kit Plugin?
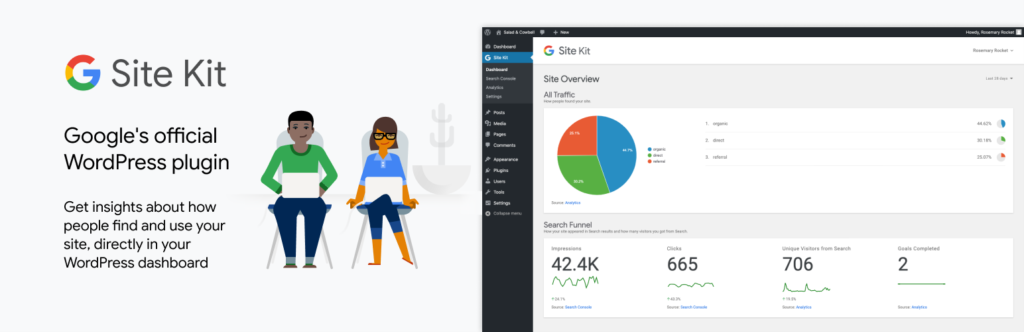
Site Kit is Google’s official WordPress plugin, designed to give site owners, developers, and agencies a unified dashboard integrating key products like Search Console, Analytics, PageSpeed Insights, AdSense, Tag Manager, Google Ads, and more.
- Better Integration with Analytics, Tag manager and Adsense.
- No need to edit code manually to verify site ownership—everything happens automatically.
- View combined performance and engagement stats directly in WordPress round the clock.
- Tailored insights: site-wide and page-level metrics easily in view.
From traffic trends and query performance to core vitals and monetization metrics, this one-stop analytics integration empowers smarter decisions across your online presence.
How to setup Google Sit Kit for Wordpress?
Getting set up is intuitive:
- Ensure compatibility – Use WordPress 4.7+ on a live site.
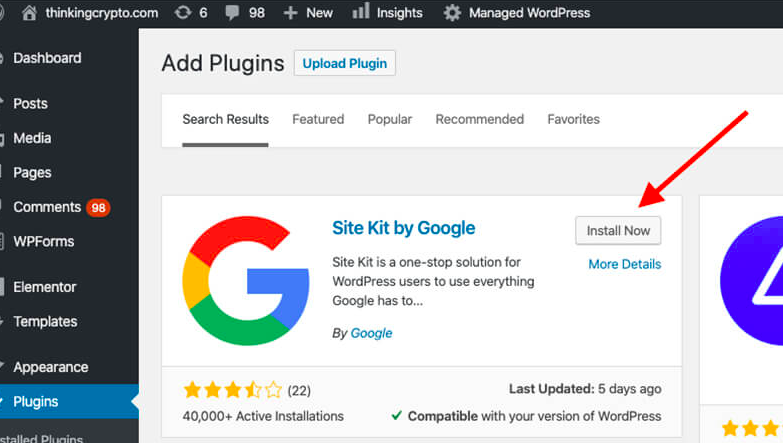
- Add and activate the plugin via Plugins → Add New, search for Site Kit plugin, install and activate.
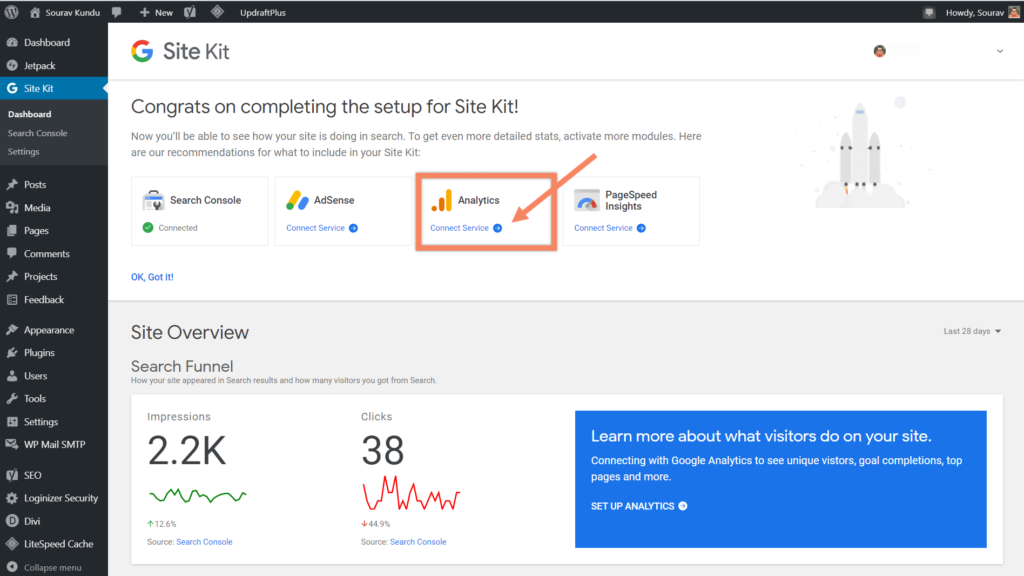
- Start setup – Click “Start Setup” in the Site Kit admin page, log in with your Google account, and grant permissions.
- Ownership verification – The plugin verifies your site via Search Console automatically—no manual code needed.
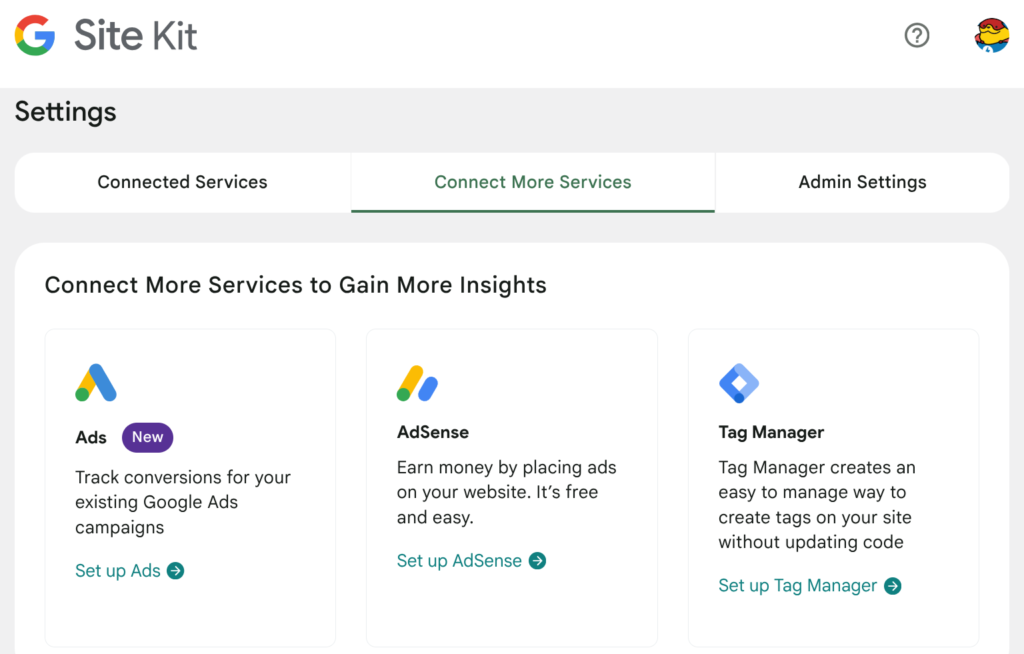
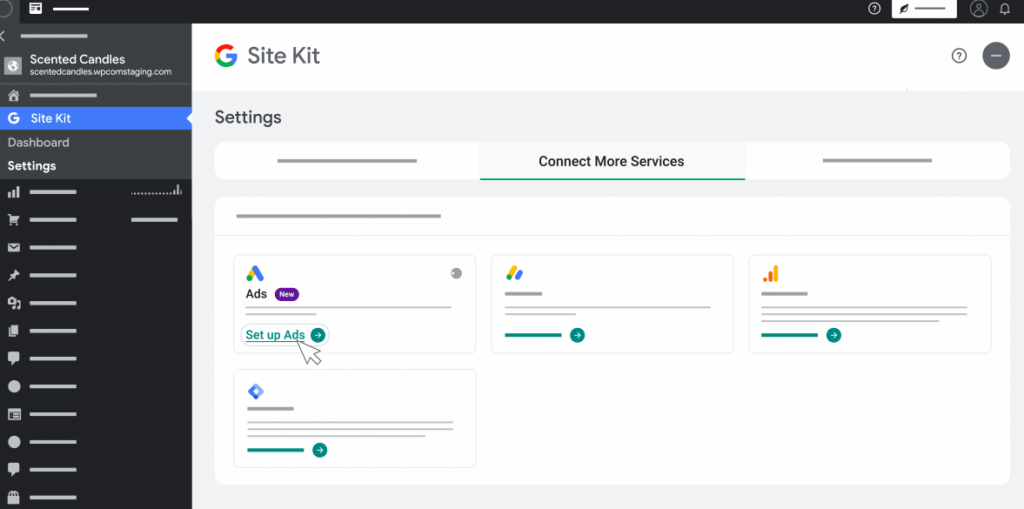
- Connect additional services – Go to Site Kit → Settings → Connect More Services and link Analytics, PageSpeed Insights, Tag Manager, AdSense, etc.
- Access your dashboard – Once active, stats appear under Site Kit → Dashboard; each service also gets its own menu section.
Pro Tip: For staging environments, you can use the Developer Helper plugin and custom OAuth2 credentials to pull production data safely.
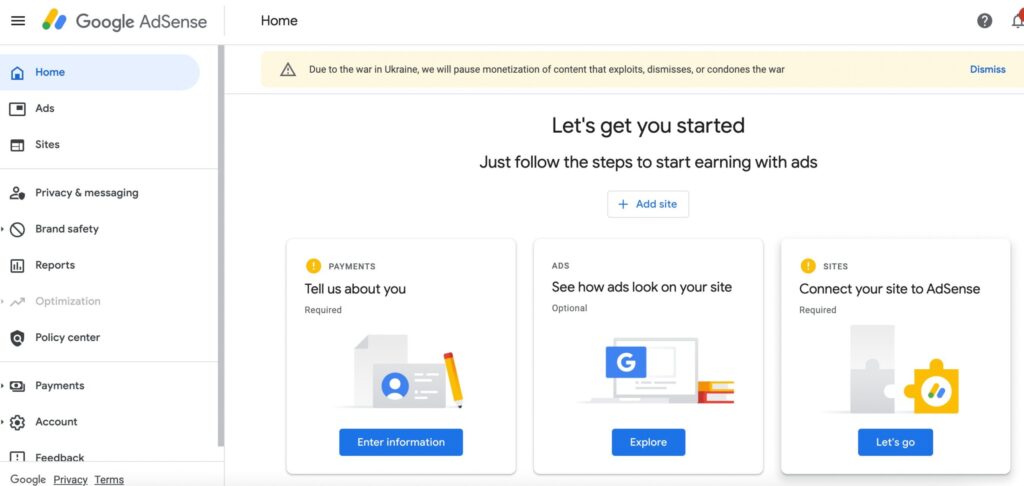
How to connect Adsense with Site Kit by Google?
As soon as services are connected:
- Search Console data like clicks, impressions, query terms, and position appear in the dashboard.
- Analytics (GA4) shows organic vs. direct traffic, session duration, and engagement metrics.
- PageSpeed Insights presents lab and field data, including LCP, CLS, and improvement suggestions.
- AdSense/Ads stats display monetization performance and earnings overview.
- Tag Manager simplifies tag deployment without code edits.
- Admin toolbar integration allows insights right from the front-end, though users occasionally report glitchiness.
Dashboards can be filtered by date ranges (e.g., last 28 days), and page-specific details are just a click away.
How Google Site kit helps in SEO?
One of the most powerful features of Google Site Kit is how it consolidates data from various Google tools into a single, accessible dashboard. Whether you’re monitoring ON Page SEO checklist performance, page speed, user behavior, or monetization, Site Kit empowers you to make data-driven decisions with minimal effort.
Performance & Visibility Metrics
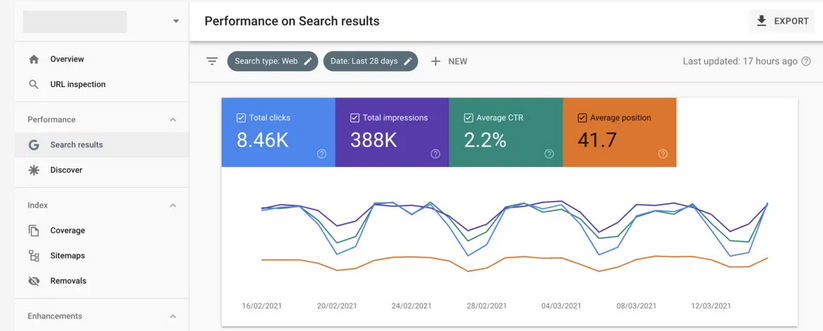
Site Kit integrates directly with Google Search Console, enabling you to understand how your site performs in organic search.
How to see metrics with Site kit?
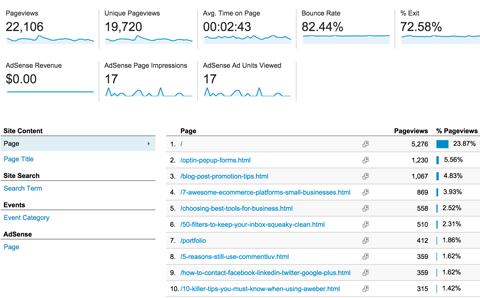
- Total Clicks: See how many times your site appeared in search results and was clicked.
- Impressions: The number of times your site was shown in Google Search.
- Click-Through Rate (CTR): A percentage that shows how often people click on your links compared to how often they see them.
- Average Position: The average ranking position of your content in Google Search results.
These metrics are presented in both summary and detailed views, helping you evaluate what queries bring the most traffic, which pages rank best, and what needs optimization.
Search Funnel Analysis
By reviewing the full funnel from impressions → clicks → sessions, you can identify potential drop-offs in visibility or engagement. For example, high impressions but low clicks may signal poor meta titles or descriptions that don't entice users.
Page-Level Insights
Each page of your website can be analyzed for individual performance. This includes the number of clicks it receives, its position in search results, and which queries are driving its traffic. You can access these by visiting the page while logged in and clicking the Site Kit menu in the admin toolbar at the top.
Can we connect Google Analytics to Site Kit?
Yes. When you connect Google Analytics through Site Kit, you gain access to deeper insights into your audience.
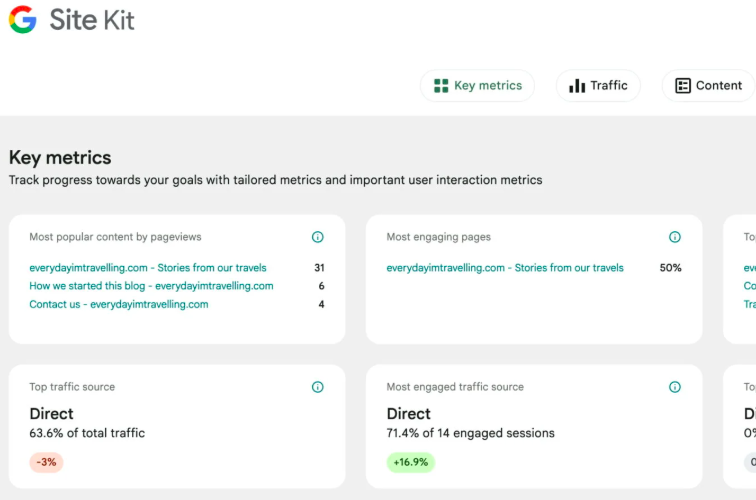
What metrics does Google Site kit show?
- User Demographics & Devices: See what types of devices people are using and their general location.
- Acquisition Channels: Discover where your visitors are coming from—Google Search, social media, direct links, or referrals.
- Engagement Metrics:
- Sessions and Pageviews: Understand the volume of traffic your site is getting.
- Average Session Duration: See how long people stay on your site.
- Bounce Rate / Engagement Rate: Measure how many users leave without interacting.
This information is critical for tailoring your content and improving the user experience. For example, high bounce rates on a blog post might indicate that the content is not matching searcher intent or is difficult to navigate.
Does Site Kit support Google Analytics 4?
Site Kit supports Google Analytics 4 (GA4), which introduces an event-based tracking model. This means you can track user interactions (scrolls, clicks, video plays) more flexibly than in the older Universal Analytics.
How to check site speed with Site kit plugin?
PageSpeed Insights integration allows you to track and improve performance based on real-world user experience data.
Core Web Vitals Tracked:
- Largest Contentful Paint (LCP): Measures load speed. Ideal is under 2.5 seconds.
- Cumulative Layout Shift (CLS): Measures visual stability. Lower is better.
- First Input Delay (FID) and Interaction to Next Paint (INP): Evaluate how fast the page responds to user interactions.
You'll also see lab data from Lighthouse audits, like:
- Opportunities to reduce unused CSS/JS
- Recommendations to defer offscreen images
- Time to Interactive (TTI)
- Total Blocking Time (TBT)
These scores are not just helpful—they’re a ranking factor in Google’s search algorithm. Site Kit makes it easy to monitor these directly from your WordPress dashboard, enabling you to take quick action when performance drops.
Does Site Kit show earnings from Adsense?
If you monetize your site through Google AdSense, Site Kit can help track your earnings and ad performance. Once connected, you'll see:
- Estimated Earnings: Daily and monthly overviews.
- Page-level Ad Performance: Which pages earn the most.
- Ad Coverage and CTR: See how frequently ads are shown and clicked.
This is especially helpful for content creators, bloggers, or publishers who want to optimise monetisation efforts without logging into a separate AdSense account.
Pro Tip: Pair AdSense metrics with analytics data. For example, pages with high traffic but low earnings might benefit from better ad placement or layout improvements.
How to connect Google Tag Manager with Site kit?
Site Kit also supports Google Tag Manager, which lets you deploy custom tags and track user interactions without altering your website code.
Use Cases
- Track form submissions and newsletter signups as conversions.
- Monitor eCommerce events like add-to-cart or purchases.
- Set up event tracking for button clicks, video engagement, or PDF downloads.
You can configure these within Tag Manager’s UI and Site Kit ensures the container is installed and running properly on your WordPress site.
How to use Cross service reporting in Site kit?
The real power of Site Kit lies in its cross-service reporting. When you view metrics from Search Console, Analytics, PageSpeed Insights, and AdSense all in one place, it becomes easier to spot patterns.
- A blog post ranking well in Search Console but showing a high bounce rate in Analytics might need better internal linking or content structure.
- A product page with fast LCP but poor conversion might require changes in call-to-action placement or clearer value messaging.
- Pages with high engagement but poor monetization may benefit from revised ad strategies or affiliate marketing enhancements.
Site Kit’s unified dashboard encourages this kind of synthesis, leading to well-informed actions that improve SEO, user experience, and revenue simultaneously.
What are the features of Google Site kit Plugin?
- Monitor your queries – Use Search Console data to adjust titles, headers, and on-page content targeting high-traffic phrases.
- Core Web Vitals improvement – Prioritize fixes for things like LCP and CLS flagged in PageSpeed reports.
- Page-specific actions – Within Site Kit, use the search bar to zero in on underperforming URLs and troubleshoot them.
- Content updates – Refresh old posts with current facts, better user experience, media elements, internal links, and targeted keyword research in 2025.
- Speed enhancements – Use caching, image compression, lazy loading, minification, CDN integration.
- Note: Users report small impact on speed from analytics scripts. If performance suffers, consider local hosting for analytics JS (e.g. CAOS or True Lazy Analytics).
- Set up goals and conversions – Use Tag Manager via Site Kit to track actions like form submissions and purchases.
- E-commerce tracking – For WooCommerce, native support may be limited. Better handling is via GTM4WP for full event tracking.
- Permissions control – Grant selective dashboard access to clients or team members to prevent accidental changes.
- Check monthly – Make it a habit to review dashboards, discover rising keywords, traffic slumps, or speed performance shifts.
How to solve errors in Google Site kit?
While Google Site Kit is designed to be lightweight and user-friendly, performance-conscious website owners may wonder whether adding yet another plugin will affect their site speed or resource usage. This is a valid concern—especially for WordPress sites aiming to pass Core Web Vitals or running on limited hosting environments.
Let’s explore how Site Kit interacts with your site, where potential slowdowns may occur, and how to mitigate them without losing the benefits of data integration.
Does Google Site Kit Slow Down Your Website?
By itself, Site Kit does not significantly impact front-end performance. The plugin mostly operates in the WordPress admin area and simply adds scripts from connected Google services to the front-end—such as the Analytics tracking code, AdSense ads, or Tag Manager container.
However, these external scripts can sometimes add load time depending on how they’re configured or how many you’re running:
- Google Analytics scripts (especially GA4) can delay render blocking if not loaded asynchronously.
- Google AdSense scripts may impact speed if ad slots aren't lazy-loaded.
- Tag Manager containers can include multiple tags that slow down performance if not well managed.
The more services you connect, the more potential there is for these third-party scripts to accumulate and affect page load times, Time to Interactive (TTI), and Total Blocking Time (TBT)—key metrics in Core Web Vitals.
Google Site Kit - Site not found errors
Here are the most common areas where users experience performance hits:
- Render-Blocking JavaScript – Tracking codes (e.g., GA4 or Tag Manager) may load in the section and block initial rendering.
- Lazy Load Conflicts – AdSense ads, if not properly configured, may load too early and affect Largest Contentful Paint (LCP).
- Multiple Tracking Scripts – If you’re using additional plugins for tracking (like MonsterInsights or Jetpack), you might duplicate efforts and increase overhead.
- Unoptimized Tag Manager Containers – Complex or outdated tags can slow down user interactions and event tracking.
If you're concerned about these issues, there are several proven methods to optimize your site while still benefiting from Site Kit.
Host Analytics Scripts Locally
This approach improves caching and reduces external DNS lookups. You can use this alongside Site Kit by disabling Site Kit’s Analytics output (via filter or code snippet) and handling the script manually.
Defer or Async JavaScript Loading
Use performance plugins like:
- WP Rocket
- Asset CleanUp
- Flying Scripts
These allow you to defer or async-load JavaScript files like gtag.js, adsbygoogle.js, and others injected by Site Kit. Defer loading ensures scripts don’t block rendering the visible part of your page.
Enable Lazy Loading for Ads
If you're using AdSense, consider using lazy loading via loading="lazy" attributes or WordPress ad management plugins that support delayed ad injection. This helps reduce initial page size and improves LCP.
Audit Tag Manager Containers
If you’ve enabled Google Tag Manager, conduct a full audit of your tags:
- Remove unused or deprecated tags.
- Limit tracking to essential events.
- Use triggers with conditions to fire tags only when needed (e.g., only on specific pages or after user interaction).
This can significantly reduce the weight of your GTM container and improve Interaction to Next Paint (INP).
Use a Content Delivery Network (CDN)
A good CDN like Cloudflare, BunnyCDN, or KeyCDN helps cache your content globally and minimize latency—even for third-party scripts loaded via proxying (some advanced CDNs support this).
Disable Unused Modules in Site Kit
If you’re only using Search Console and Analytics, you can skip connecting AdSense, Tag Manager, or PageSpeed Insights to reduce script overhead. This minimal approach is cleaner and better suited for performance-focused builds. Run before-and-after comparisons when enabling or disabling specific services in Site Kit. This way, you can pinpoint what’s adding load and take specific action.
How to disable Google Site Kit plugin?
You might consider deactivating or partially disabling Site Kit if:
- Your site consistently fails Core Web Vitals and optimizations don’t help.
- You require custom analytics setups that conflict with Site Kit.
- You already have a performance-first analytics solution in place.
In such cases, you can still keep your Google services integrated manually, using minimal scripts or server-side tools, while removing the plugin for front-end weight savings.
What happens if you uninstall Site kit?
Removing the plugin won’t erase your historical data in Search Console or Analytics. Those records remain stored in Google’s systems. You’d just lose the Site Kit interface and automatic script deployment.
To maintain tracking, you’ll need to manually insert replacement tags or scripts for whichever services you were using.
How Site Kit by Google helps new websites?
Site Kit offers a powerful, streamlined approach for WordPress users to leverage Google’s ecosystem across SEO, analytics, speed, and monetization—all in one dashboard. It's ideal for those seeking an integrated solution without diving into code, speeding up setup, and simplifying data visibility.
However, if site speed is a top priority—or if you need advanced tracking like e-commerce events—consider optimizing how scripts are loaded, using secondary plugins like GTM4WP, or hosting assets locally.
By combining data insights with targeted SEO updates, speed tuning, and goal tracking, you’ll be well-equipped to enhance rankings, improve user experience, and grow conversions.
